How to Construct a Cold Frame in a Weekend
A cold frame is a simple, inexpensive structure that can extend your gardening season and help you get a jump start on spring planting. It works by trapping solar heat and creating a microclimate that is warmer than the surrounding air, protecting your plants from frost and harsh weather conditions. Building a cold frame yourself is a rewarding project that can be completed in a weekend with basic DIY skills and readily available materials. Here's a step-by-step guide to help you create your own cold frame.
Choosing the Right Location
The first step is to choose the perfect spot for your cold frame. Look for a sunny location that receives at least six hours of sunlight per day. Ideally, it should be near a water source for easy access to water. Consider the prevailing wind direction and select a spot sheltered from strong winds. A south-facing location is preferred for maximum solar gain. You'll also want to make sure the ground is relatively level and well-drained.
Gathering Your Materials
Once you have chosen your location, you need to gather the materials you need to build your cold frame. The following is a list of common materials for a basic cold frame:
- Wood: You can use pressure-treated lumber for the frame, but cedar or redwood are better choices because they resist rot and decay.
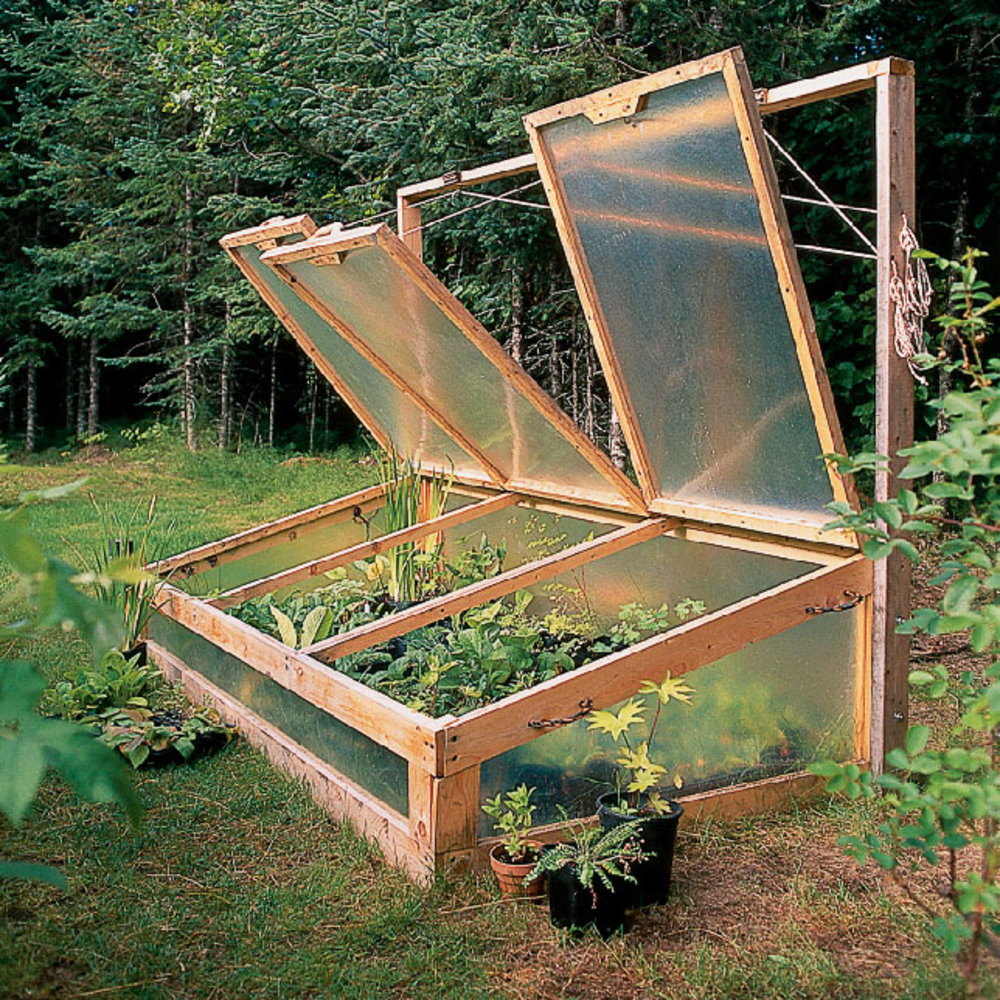
- Glass or Polycarbonate Sheet: Glass offers excellent light transmission but can be heavy and breakable. Polycarbonate is lightweight, durable, and shatterproof, making it a good alternative.
- Screws: Choose screws that are appropriate for the type of wood you are using.
- Caulk: This will help seal gaps and prevent drafts.
- Optional: Hinges and a Latch: These are helpful for creating a lid that can be opened and closed for ventilation.
Constructing the Frame
Now it's time to build the frame for your cold frame. Cut the wood to the desired dimensions. A typical cold frame is about 3 feet wide, 4 feet long, and 1 foot high. Assemble the frame using screws, making sure the corners are square and secure.
Building the Lid
The lid is a critical component, as it traps heat and regulates temperature. Create a frame that is slightly larger than the base to ensure proper ventilation. Attach glass or polycarbonate to the lid frame, ensuring it is securely fixed and there are no gaps. If you want a hinged lid, install hinges at the back of the frame and a latch to secure it.
Finishing Touches
Once the frame is complete, seal any gaps with caulk to prevent drafts and moisture from entering. You may also want to paint the exterior of the frame to protect it from the elements.
Preparing the Cold Frame
Now, prepare your cold frame for planting. Add a layer of drainage material like gravel or pea gravel at the bottom to prevent waterlogging. Next, add a layer of potting soil or a mixture of soil and compost.
Planting and Caring for Your Cold Frame
You can start seeds directly in your cold frame or transplant seedlings from indoors. Water regularly, especially during dry spells. Monitor the temperature inside your cold frame and adjust ventilation as needed. Remove weeds and dead plants.
Enjoying Your Cold Frame
Now that you have built your own cold frame, enjoy extending your gardening season and starting your plants early! With a little effort, you can create a flourishing haven for your plants and reap the rewards of a longer harvest.


No comments:
Post a Comment
Note: Only a member of this blog may post a comment.